I don’t think there will ever be a day on this earth where some artist, somewhere, regardless of skill level, isn’t told to work on their fundamentals. When I started out, the prospect of workin’ on my “fundies” seemed so tedious. ”I want to draw sick fantasy environments and scenes, not stare at people lying around,” I thought.
Between then and now, my perspective’s changed a good amount. I’ve gotten better at carving out time for deliberate practice. And, probably more importantly, I’ve realized how vital it is to be rock-solid on your fundamentals before you can execute on your own personal vision. Nowadays, whenever I’m in an art block, I do a few figure studies to get things moving.
I’m by no means an expert figure artist, but I figure it may be interesting to some folks to see how I go about things. And hey, if you have any tips or want to share how you approach your practice, feel free to reach out! Love talking about this kind of stuff.
Getting reference
First up, you’ll need reference. It’s best to go to an in-person figure drawing session if you can, though the next best thing is photo reference.
When it comes to reference, I cannot, cannot, CANNOT!! understate how much I absolutely love reference.pictures. As a digital artist who is short on time, this site is a godsend.
The site is run by Noah & Rachel Bradley, and they are constantly out taking reference photos of figures and environments. A lot of the reference on the site is free, and some are pay-what-you-want via Gumroad. I’ve bought most of their reference sets and use them all 👏 the 👏 time 👏. The drawings I’ll be showing today are based on their figure drawing set.
My process
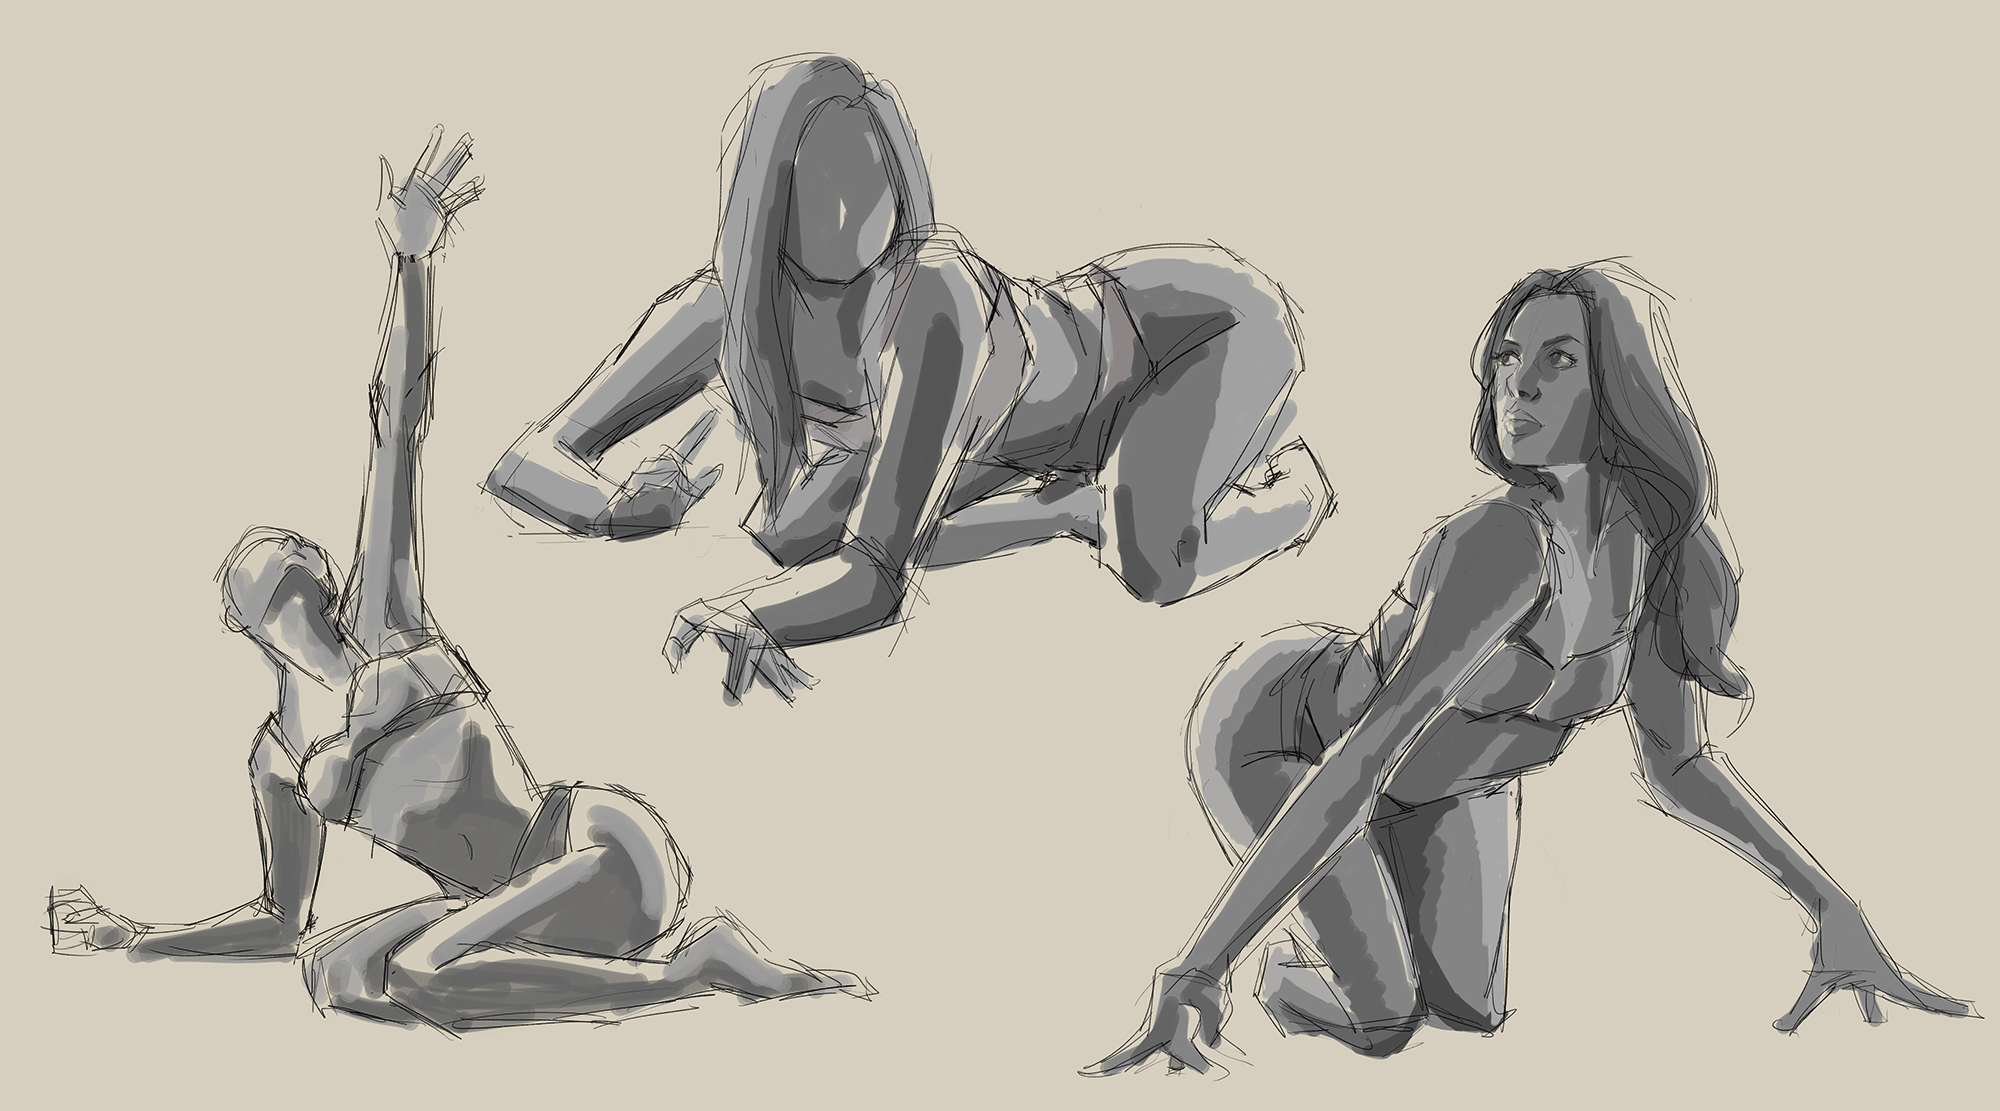
When sitting down to do figure studies, I usually draw each pose two or three times before moving on to another one. My stages:
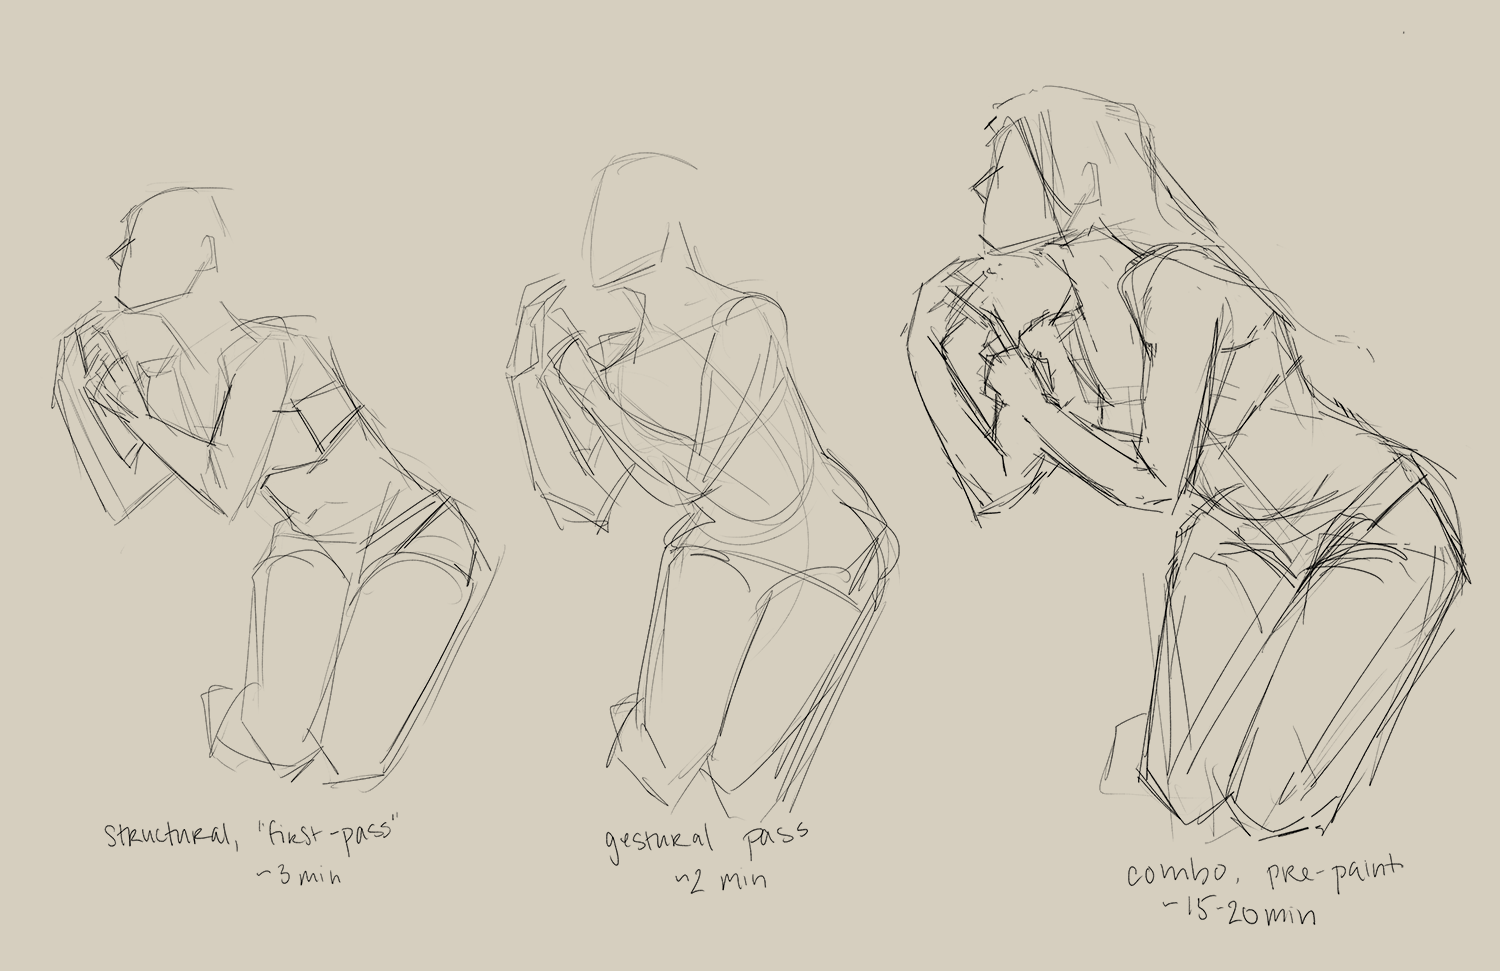
- Structural. First up, I’ll roughly map out the shapes and proportions of the body. I usually skip details at this stage and will flub stuff like hands and hair.
- Gestural. I’ll briefly put accuracy on the backseat and try to really capture the movement and feeling of the model. Unfortunately I don’t think the drawing I did up top is a great example of this… but maybe it’s enough to give you an idea?? With this drawing I try to push the pose and curves.
- Combo! My last drawing will then (hopefully?) be a combination of the better aspects of the first two. I’ll spend more time resolving the structure and positioning, while also working in elements of the gestural that I thought were cool or successful.
Next up comes the shadows. I’ve often found that, depending on the pose, the outer linework can be mostly accurate but the overall drawing can still look bonkers because of foreshortening or lighting. Some artists are much more successful with their linework and can expertly convey forms with just line; for me I like blocking in shadows to resolve the visual drama and conflama.

I try not to use a lot of values (stick with 3-4) for my studies. My end goal is to have strong and simple forms, and it’s easier to stick to that the fewer values you have at your disposal.
My steps for painting:
- First up I’ll block out the largest shadow shapes. Sometimes along the way I’ll notice something wrong with the drawing and correct it.
- Next I’ll take a pass at the deep shadows. It’s important not to get too crazy with the values here—several times I’ve thought, “oh this dark grey will look so sick” but then you zoom out and it looks crazy because it contrasts too much. So the shadows can be deep, but not 20k leagues under the sea deep.
- At this stage the highlights often end up looking too light compared to the whole, so I’ll add in some midtones to soften things up. You’ll notice in the second drawing the highlighting on the model’s right thigh looks really bright in relation to what’s around it—I think it looks a bit more natural in the third version.
During the last step I’ll also clean up the sketch a bit. Unfortunately, I’m a messy sketcher. Basically every art professor or lecturer will tell you not to “pet your lines,” but I treat my lines like dogs. Getting to the point where you can put a single line down smoothly and confidently takes a massive amount of practice. Hopefully I’ll get there one day!
Timing
When you’re in a live figure drawing session, you’ll often start out with several 1-minute poses, then a few 5-minute poses, followed by a 30-60min+ long pose. I find that, even with photo reference, sticking with similar time limits helps exercise your noggin and gets you thinking about how to simplify forms efficiently.
My initial structural and gestural sketches usually take anywhere between 1-3 minutes, with the more refined version taking around 20 (~30-40 if you include the painting). I get a lot of value out of the repetition, and each time I draw the same pose I learn more about how to approach drawing the figure effectively.
A learning technique I’ve heard of that’s similar to this (though I haven’t got the chance to try it yet) is attempting to draw the same pose every day and tracking the evolution. I’ll be honest that at first that sounded a bit boring to me, but I think there’s a lot of value to be had out of going through the exercise. I’ll probably give it a shot at some point, and let you know the results!
The sendoff
That about sums it up for my figure drawing process, at least for now. How does your process differ? What works (or doesn’t work) for you? Feel free to get in touch if you want to talk more about this kind of thing. Either way, happy drawing!